Manually granting digital assets to contacts in ClickFunnels effectively delivers specific content directly to your users outside of the usual automated processes. This feature is particularly valuable when you share resources individually, ensuring that your contacts receive the exact materials they need. Once granted, the assets are accessible in the contact’s Customer Center, where they can easily download the content. In this article, you will learn how to manually grant digital assets to your contacts, ensuring they have access to the right resources at the right time.
Requirements
An active ClickFunnels account
A digital download file uploaded to Assets
How to Manually Grant Digital Assets to Contacts
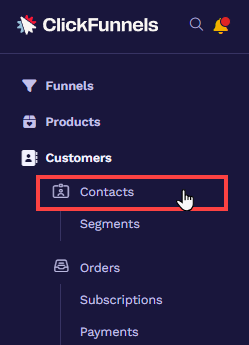
From your ClickFunnels dashboard, go to the Customers menu and select Contacts.
Choose the contact you want to grant a digital asset to by clicking on their name, which will open their contact profile.
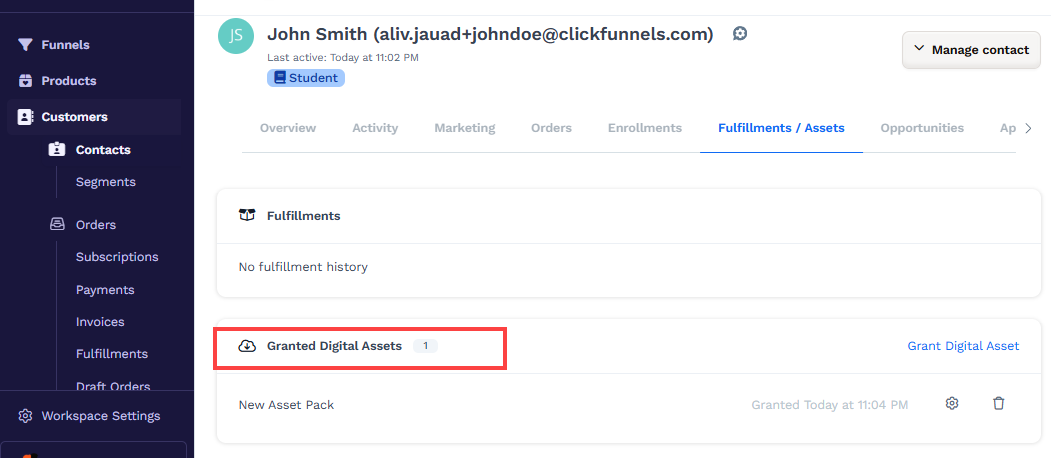
In the contact’s profile, navigate to the Fulfillments / Assets tab to view any assets already granted to the contact.
Scroll to the Granted Digital Assets section to manage or view existing assets.
Click the Grant Digital Asset option to add a new asset, opening a selection window.

From the dropdown menu in the window, select the asset you want to grant, then click Create Granted Asset to save the changes.
The contact will receive an email notification informing them that the download is available in their Customer Center. Afterwards, they have to follow these steps:
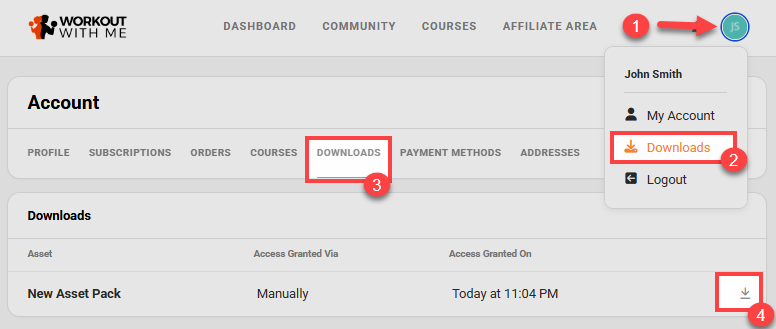
Log in to the Customer Center.
Navigate to the Profile icon.
Select the Downloads menu.
The Downloads tab displays all the available downloads. Clicking the Download icon will download the resource to their local storage.