Product tags help organize and categorize items in ClickFunnels. Businesses can use tags to highlight bestsellers, mark limited-time offers, or group similar products for easier management. Tags also make it simple to filter and find products, especially when handling large inventories.
In this article, we'll go over how to create, manage, and use product tags to keep your product list organized.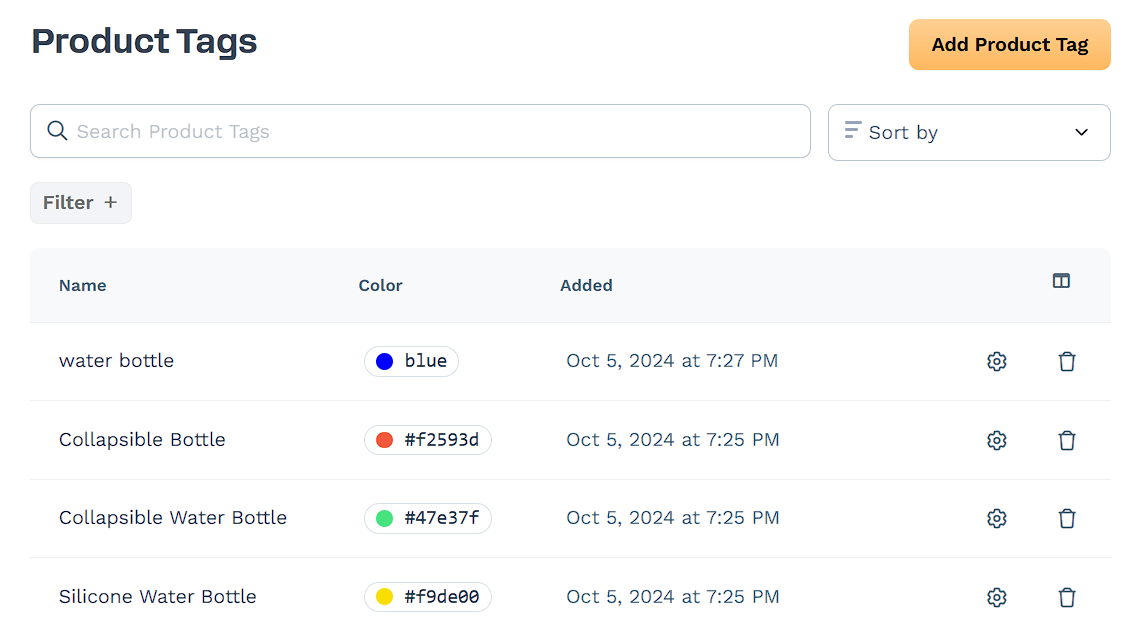
Requirements
An active ClickFunnels account
Adding a New Product Tag
In the ClickFunnels dashboard, navigate to Workspace Settings.
Select Tags, then click Products.
Click Add Product Tag in the upper-right corner.
Enter a name for the tag in the Name field.
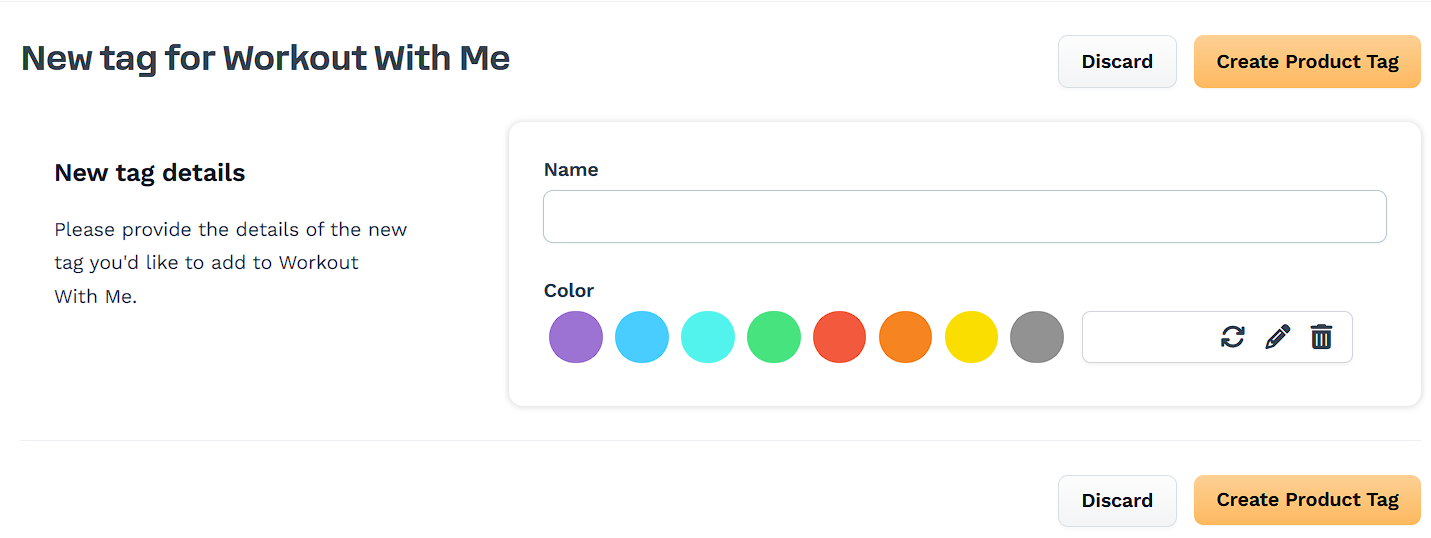
Choose a Color to help visually distinguish the tag.
Click Create Product Tag to save.
IMPORTANT
Tag names must be unique. Tag names are case-insensitive, so “Product Tag” and “product tag” are treated as the same. If you create a tag that already exists, the system will still create the tag but automatically add a suffix to make it unique.
Example: Creating a tag called “SummerCollection” when one already exists will create “SummerCollection (Duplicate)”.
Additional duplicates will be numbered: “SummerCollection (Duplicate 2)”, “SummerCollection (Duplicate 3)”, etc.
Managing Product Tags
Once you've created product tags, you can edit or delete them from the Product Tags page.
Editing a Product Tag
Locate the tag in the Product Tags list.
Click the gear (⚙) icon to open the edit menu.
Modify the Name or Color as needed.
Click Update Product Tag to save changes.
Deleting a Product Tag
Find the tag you want to remove.
Click the trash icon.
Confirm the deletion by clicking Proceed.
Adding Tags to Existing Products
In the ClickFunnels dashboard, go to Products and select All Products.
Find the product you want to tag and click the gear (⚙) icon.
In the Tags section, click the field to open the tag selection menu.
Select one or more tags from the list.
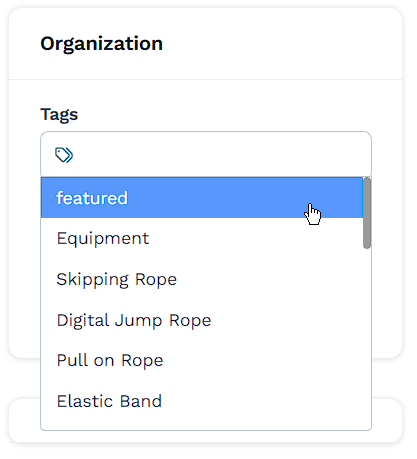
To remove a tag, click the "X" next to it.
Click Update Product to save the changes.
Filtering Products by Tags
In the ClickFunnels dashboard, go to Products > All Products.
Click Filter + to open the filter options.
Select Product Tags from the list.
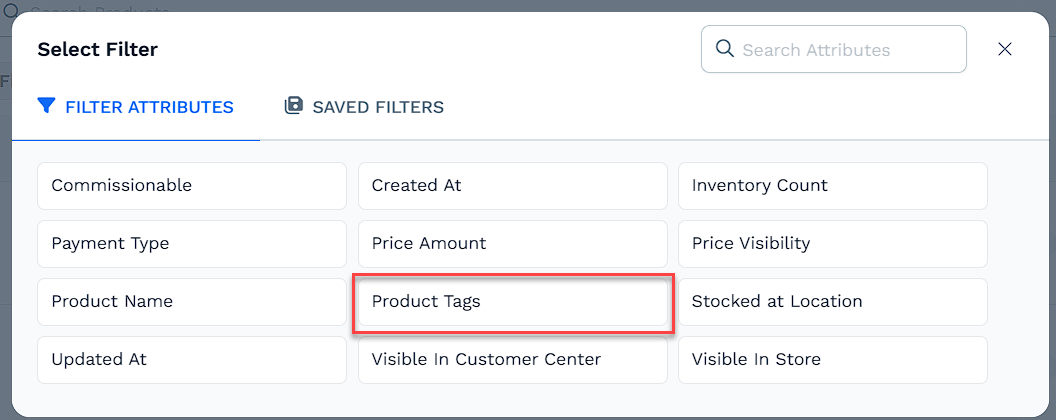
Choose a rule (e.g., is, is one of) and select the tag(s) you want to filter by.
Click Apply to view the filtered results.