Funnel tags are labels you can attach to your funnels to keep everything organized and easy to find. Think of them as folders or categories that help you group related funnels together. For example, you can tag funnels based on their purpose, such as “Lead Generation” or “Product Launch,” making it simple to locate and manage them later. In this article, we’ll show you how to add and manage funnel tags so you can keep your funnels organized and save time when working on your marketing campaigns.
Requirements
An active ClickFunnels account
Adding a New Funnel Tag
Navigate to Workspace Settings in the sidebar menu, click Tags, and select Funnels.
Click Add Funnel Tag in the upper-right corner of the Funnel Tags page.
Enter a unique name for the tag in the Name field (e.g., "Webinar" or "Imported").
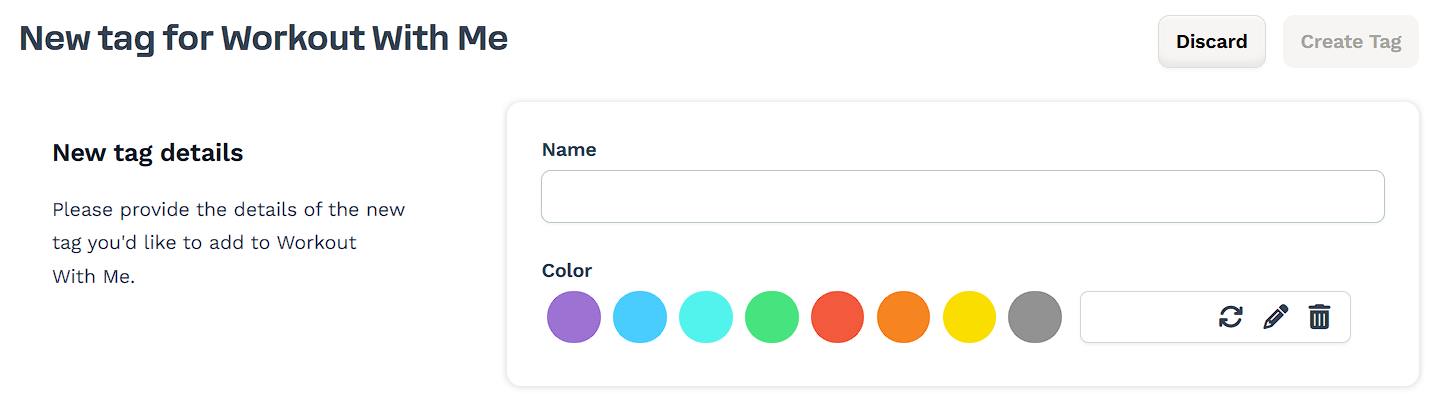
Select a color to visually distinguish the tag by clicking one of the available color options.
Click Create Tag to save the new tag.
IMPORTANT
Tag names must be unique. Tag names are case-insensitive, so “Funnel Tag” and “funnel tag” are treated as the same. If you create a tag that already exists, the system will still create the tag but automatically add a suffix to make it unique.
Example: Creating a tag called “BlackFridayPromo” when one already exists will create “BlackFridayPromo (Duplicate)”.
Additional duplicates will be numbered: “BlackFridayPromo (Duplicate 2)”, “BlackFridayPromo (Duplicate 3)”, etc.
How to Add Funnel Tags From Funnels Dashboard
Click on Funnels from the left navigation menu to view all your funnels.
Identify the funnel you want to add a tag to and click on the Settings icon. You may need to scroll to the right to find the icon.
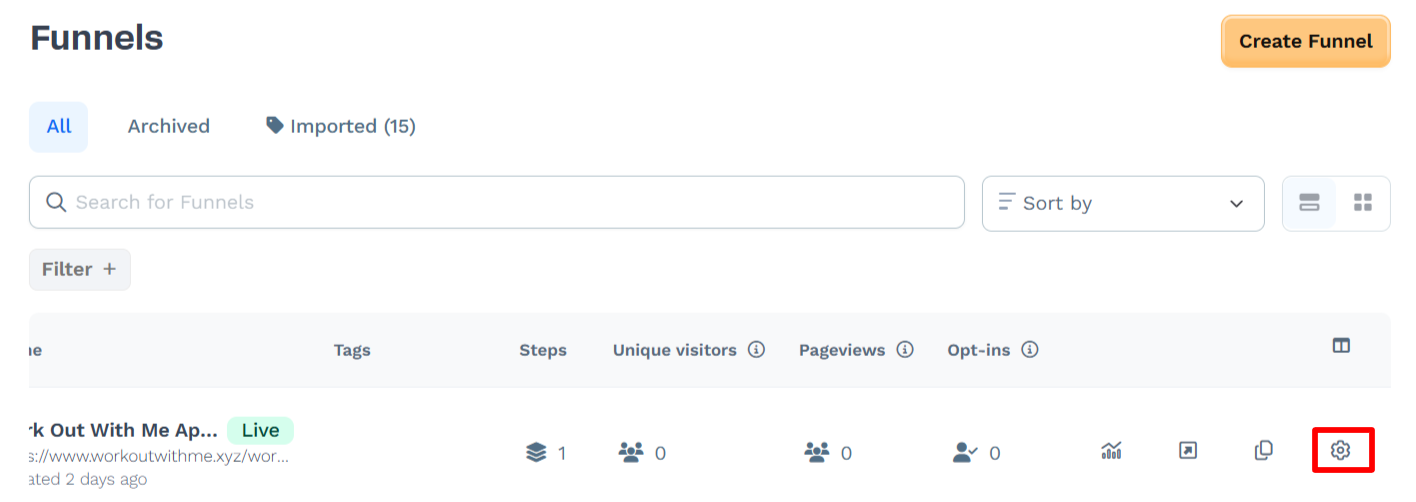
Scroll down to the Tags section. Type in the tag you want to add and press Enter or choose an existing tag from the drop-down menu.

NOTE
You can add more than one tag to each funnel.
Click on Update Funnel to save the changes.
How to Add Funnel Tags From Funnel Workflow Editor
Click on Funnels from the left navigation menu.
Click on the funnel you wish to add a tag to open the Funnel Workflow Editor.
Click the Settings icon on the top right of the Funnel Workflow Editor.
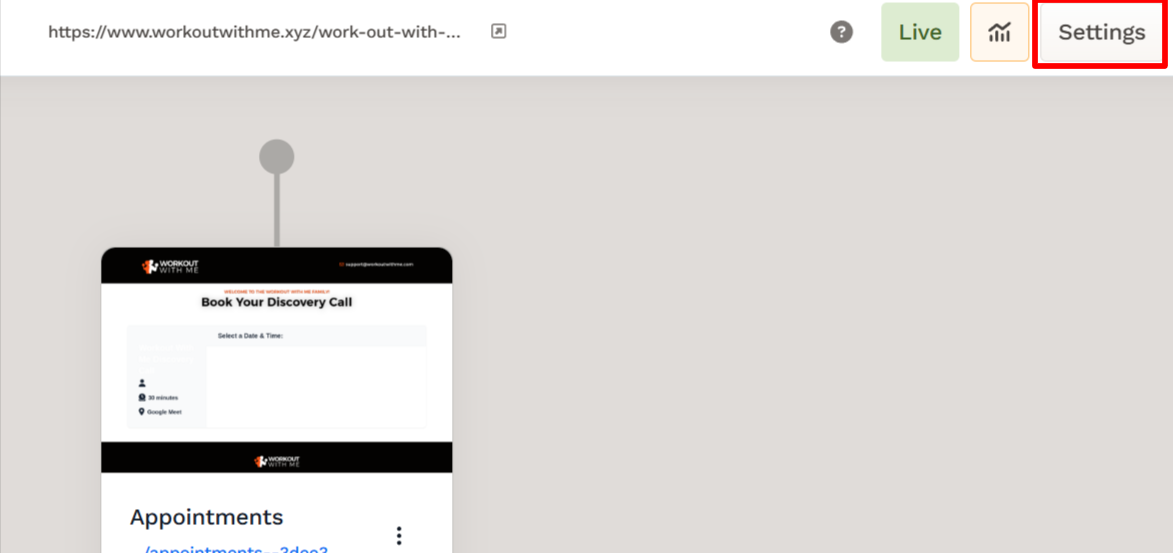
In the Tags section, you can either add new tags or select existing ones.
click Update Funnel to save your changes.
How to Manage Tags
View Tags:
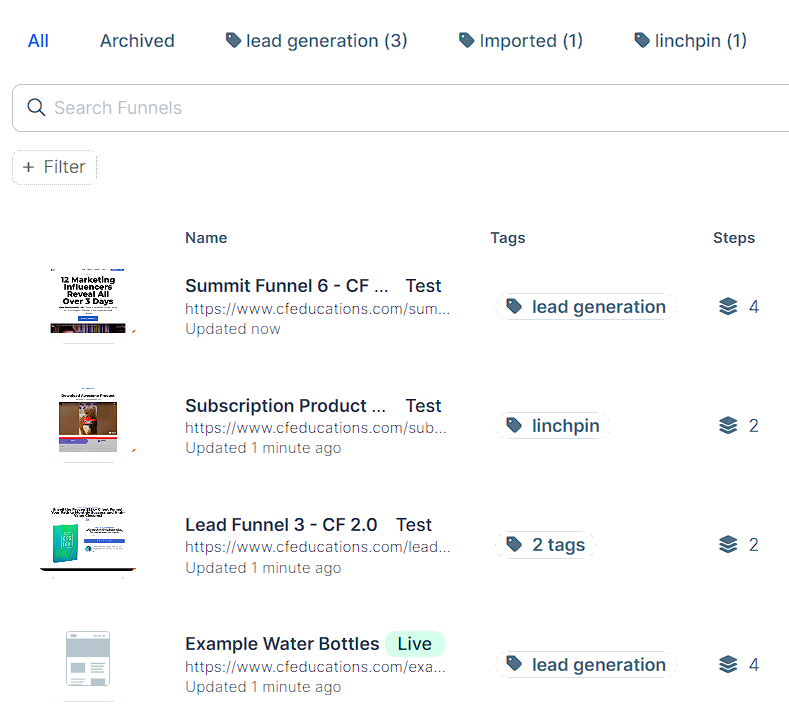
Funnel tags will be displayed at the top of the Funnels Dashboard.
Click on a tag to view the funnels associated with it.
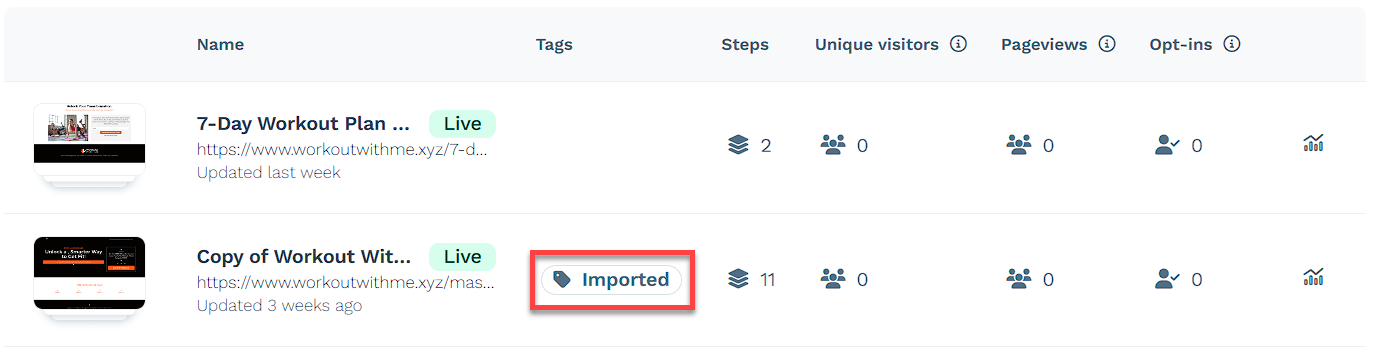
You can also click on the tag next to any funnel to view all funnels associated with that tag.
NOTE
The three tags with the most associated funnels will appear at the top. You can find other tags in the “More Tags” drop-down menu.
Delete Tags From Workspace Settings:
Navigate to Workspace Settings in the sidebar menu, click Tags, and select Funnels.
Find the tag you want to delete in the Funnels Tags list.
Click the trash icon next to the tag.
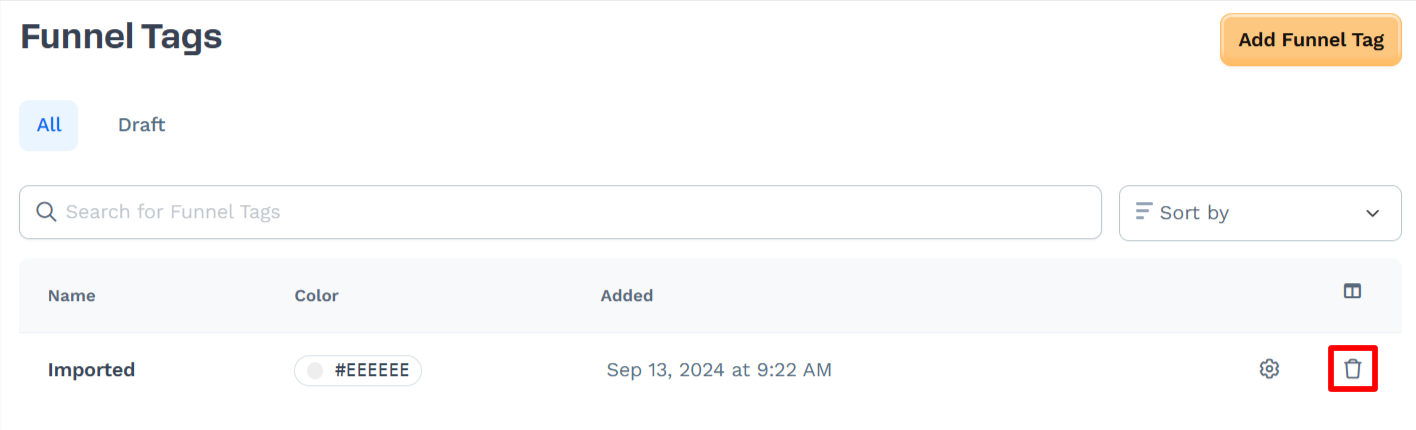
Confirm the deletion in the pop-up prompt by clicking Proceed.
Delete Tags From Funnels Dashboard:
In the Funnel Dashboard, identify the funnel you want to delete a tag from and click on the Settings icon.
In the Tags section, click the x icon next to any tag you want to remove.
Click on Update Funnel to save the changes.
Delete Tags From Funnel Workflow Editor:
Click the Settings icon on the top right of the Funnel Workflow Editor.
In the Tags section, click the x icon next to any tag you want to remove.
Click on Update Funnel to save the changes.